13 Common Roof Problems and Their Solutions Every Homeowner Should Know

Your roof works hard every single day. Rain, snow, wind, heat, and cold all hit your roof before they ever reach you or your family. But no roof lasts forever without problems. Over time, every roof develops issues — some small and easy to fix, others serious enough to threaten the structure of your entire home.

The biggest mistake most homeowners make is waiting too long. A small leak ignored for one season can rot your wood framing, grow mold in your walls, and ruin your insulation. A few missing shingles left unattended through winter can turn into a major interior water damage situation by spring.

The good news is that most roof problems are completely fixable — and many are preventable — when you know what to look for and act quickly. You do not need to be a roofing expert to protect your home. You just need to understand the warning signs and know what the right solution looks like.

In this guide, we cover all 13 of the most common roof problems homeowners face, explain exactly what causes them, walk you through the complete solution for each one, and tell you when it is time to call a professional.

Most Common Roof Problems Homeowners Face and Complete Solution for Each One

Problem #1: Roof Leaks — The Most Urgent Roofing Problem You Can Face

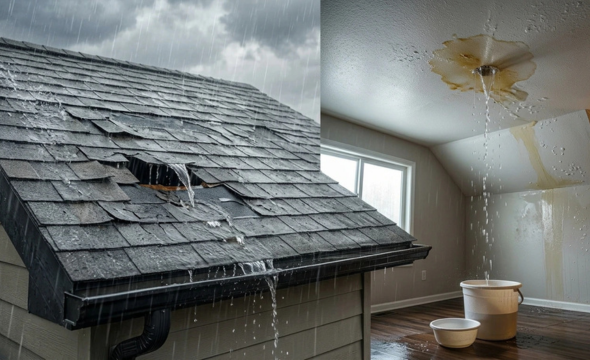
Of all the roof problems a homeowner can face, a leak is the most urgent. Water is incredibly destructive. Once it gets past your shingles and underlayment, it moves through your attic, soaks into insulation, travels along rafters and joists, and eventually shows up as a stain on your ceiling or a drip in your living room. By the time you see it inside your home, the damage has usually been building for weeks or even months.

What Causes Roof Leaks?

Roof leaks rarely happen for just one reason. The most common causes include:

  • Cracked, curled, or missing shingles that leave the underlayment exposed
  • Damaged or separated flashing around chimneys, skylights, and vent pipes
  • Clogged gutters that force water to back up under the shingle edges
  • Ice dams that form along the roof edge in winter and trap liquid water underneath shingles
  • Old age — as shingles dry out over the years, tiny gaps open up that allow water to work through

How to Find the Source of a Roof Leak

Water is deceptive. It almost never drips directly below where it enters the roof. Instead, it travels along roof boards, rafters, and ceiling joists before dropping down somewhere completely different. The best place to start is your attic. On a dry day, go up with a good flashlight and look for:

  • Water stains or dark discoloration on the wood
  • Wet, compressed, or damaged insulation
  • Visible daylight coming through the roof deck
  • Soft or spongy areas on the attic floor boards

Trace those signs as far up the slope as you can — the actual entry point is almost always higher up than where the staining appears.

The Complete Solution for Roof Leaks

Temporary relief starts with a heavy-duty waterproof tarp secured tightly over the damaged area if a roofer cannot come immediately. This prevents further interior damage while you wait.

The permanent fix requires a professional. A qualified roofer will:

  • Remove the damaged shingles in the affected area
  • Inspect the underlayment and decking beneath for rot or moisture damage
  • Replace any soft, rotted, or saturated wood decking boards
  • Install new underlayment and properly overlapped, sealed shingles

Simply laying new shingles over a damaged area without checking what is underneath is one of the most common shortcuts in roofing — and it never lasts.

To prevent future leaks:
  • Schedule a professional roof inspection at least once a year
  • Keep your gutters clean and flowing freely
  • Have flashing inspected and resealed every five to seven years
  • Replace cracked or missing shingles the moment you notice them
A split-screen image showing rainwater pouring through a large hole in a shingle roof (left) and the resulting interior water damage with a leaking ceiling and puddles on a wooden floor

Problem #2: Damaged or Missing Shingles — Your Roof’s Broken Armor

Shingles are your roof’s outermost armor. Every single shingle is doing a job — shedding water, blocking UV rays, resisting wind, and protecting the layers underneath. When shingles crack, curl at the edges, develop bald patches, or blow off entirely, that protection disappears and the roof becomes vulnerable to everything the weather throws at it.

What Causes Shingle Damage?

  • High winds break the adhesive sealant strip, causing shingles to lift and eventually tear off
  • Hail impacts crack and bruise shingles in ways that are not obvious from the ground
  • Old age causes shingles to dry out, become brittle, and curl upward at the edges
  • Poor installation — shingles nailed too high or with too few fasteners fail years ahead of schedule
  • Falling debris from overhanging trees cracks and displaces shingles

Warning Signs to Watch For

  • Shingles on the ground or in the yard after a storm
  • Dark, bare, or uneven patches visible on the roof surface
  • Heavy buildup of granules collecting in the gutters
  • Shingles that look thin, curled, or discolored from the ground

The Complete Solution for Damaged Shingles

The right fix depends entirely on how widespread the damage is:

Individual shingle replacement works best when damage is limited to a small number of shingles and the surrounding roof is still in good shape. The roofer removes only the damaged pieces, checks the underlayment beneath, installs matching replacement shingles, and seals all edges properly.

Partial roof replacement makes sense when an entire section — such as one full slope — has widespread damage while other areas are still healthy. That section is stripped to the decking and fully rebuilt.

Full roof replacement is the most cost-effective long-term decision when damage is extensive across most of the roof, or when shingles are 20 or more years old and showing widespread deterioration. Continuing to patch an old roof costs more over time and never fully solves the problem.

When selecting replacement shingles, ask about:

  • Architectural (dimensional) shingles — more durable and more attractive than basic 3-tab shingles
  • Impact-resistant shingles rated for hail — a smart choice for Indiana and Ohio homeowners
  • Wind-resistant shingles rated for high-speed wind events

Is Your Roof Showing Any of These Warning Signs?

Don’t wait for a small problem to become a major repair bill. Crawley Roofing LLC offers FREE roof inspections across Indiana and Ohio. Our experienced team will give you an honest assessment — no pressure, no surprises.

Call Crawley Roofing LLC Now:  (513) 604-0193
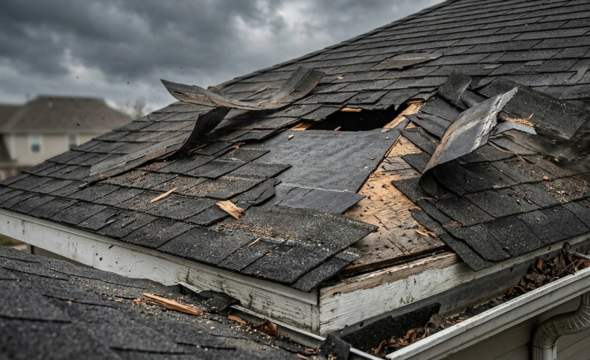
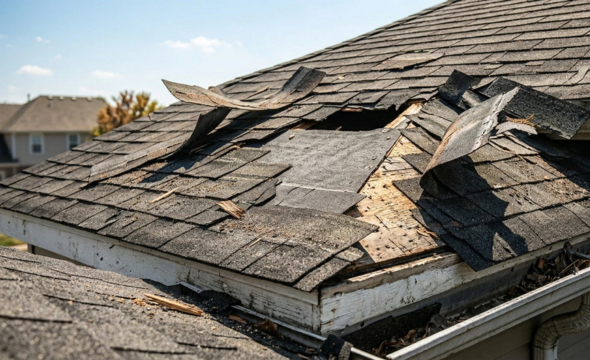
Detailed view of a damaged roof section featuring torn, curling asphalt shingles and exposed wooden underlayment

Problem #3: Clogged or Poorly Draining Gutters — A Small Neglect With Big Consequences

Most homeowners do not think of gutters as part of the roofing system — but they absolutely are. Gutters exist for one purpose: to move rainwater and snowmelt off the roof and away from the foundation as quickly and efficiently as possible. When they fail at that job, the consequences ripple across the entire home.

What Happens When Gutters Are Ignored?

  • Standing water backs up under the shingle edges and soaks into the underlayment
  • The wood fascia board behind the gutter rots from prolonged moisture exposure
  • In winter, pooled water freezes and directly contributes to ice dam formation
  • Overflowing gutters erode the soil around the foundation and allow water into basements

The Complete Solution for Clogged Gutters

Clean your gutters at a minimum twice a year:

  • Spring — after tree pollen, seeds, and blooms have fallen
  • Fall — after all the leaves have come down completely
  • After major storms — check for blockages from wind-blown debris

During every cleaning, inspect your gutters for:

  • Cracks, rust spots, or holes in the gutter channel
  • Loose or missing hangers and spikes
  • Separated joints where sections connect
  • Gutters pulling away from the fascia board
  • Low spots where water pools instead of draining

Additional steps that protect your roof long-term:
  • Ensure all downspouts discharge water at least four to six feet away from the foundation
  • Install gutter guards to reduce debris accumulation between cleanings
  • Have a roofer check the eave-edge condition during annual roof inspections
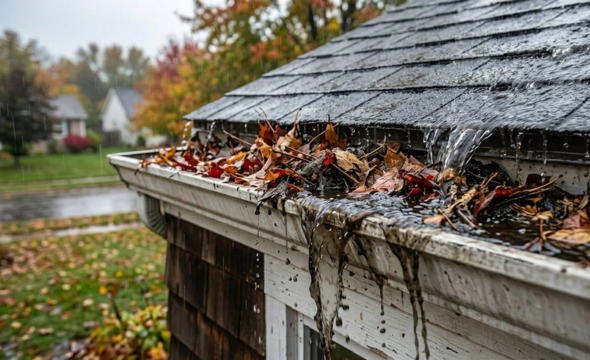
Close-up of a residential gutter filled with damp autumn leaves and debris, causing rainwater to overflow and spill over the side during a storm

Problem #4: Flashing Failures — The Hidden Source of Most Roof Leaks

If you asked most homeowners to point to the flashing on their roof, the majority could not do it. Yet flashing failures are one of the leading causes of roof leaks — and one of the most frequently missed problems during homeowner self-inspections.

What Is Flashing and Why Does It Fail?

Flashing is thin metal — typically galvanized steel, aluminum, or copper — installed at every joint and penetration point on the roof. This includes:

  • Around chimneys on all four sides
  • Around every skylight
  • Around all vent pipes and exhaust fans
  • In the valleys where two roof slopes meet
  • Wherever the roof meets a vertical wall like a dormer or addition

Common reasons flashing fails:

  • Sealant dries out and cracks from years of heat, cold, and UV exposure
  • The metal itself corrodes over time, especially at fastener points
  • Temperature changes cause the metal to expand and contract, gradually working it loose
  • Poor original installation — flashing not overlapped, bedded, or fastened correctly

The Complete Solution for Flashing Failures

Chimney flashing — The roofer removes surrounding shingles, re-installs step flashing with proper overlaps on all sides, re-embeds or replaces counter flashing, and seals all joints with fresh roofing sealant. Simply caulking over failing chimney flashing is a temporary fix that rarely lasts more than one season.

Vent pipe boots — Replace the entire boot when rubber cracks or shrinks. Patching a deteriorated rubber boot never lasts and the leak returns quickly.

Valley flashing — Shingles along the entire valley are removed, new metal flashing is installed with correct overlaps at every joint, and shingles are re-laid from the bottom up.

Skylight flashing — Often requires a complete reinstall if the original installation was improper. Many skylight leaks are caused not by the skylight itself but by incorrect flashing details.

Maintenance schedule to prevent flashing failures:
  • Have all flashing joints inspected and resealed every five to seven years
  • Always inspect flashing immediately after any major storm
  • Never allow a roofer to simply caulk over failing flashing as a permanent repair
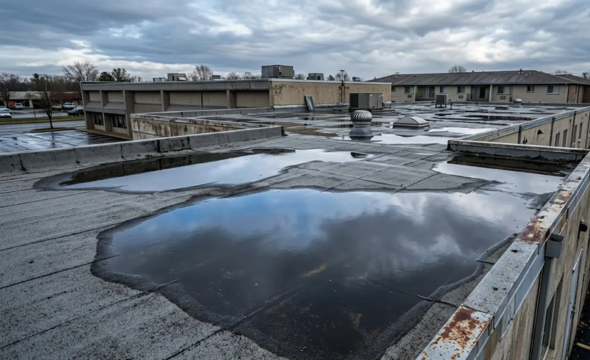
Wide shot of a flat commercial roof with significant standing water and large puddles reflecting a cloudy sky, indicating poor drainage

Problem #5: Ice Dams — The Silent Winter Destroyer

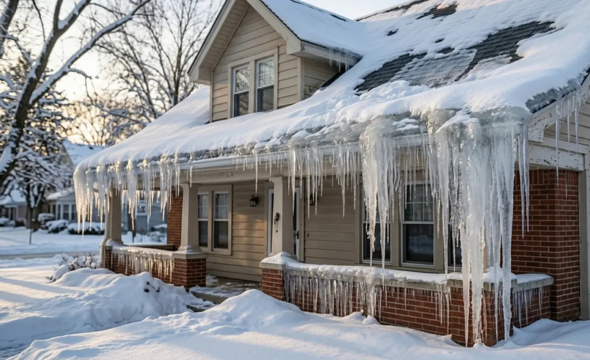
Ice dams are one of the most damaging and most misunderstood winter roof problems. They look dramatic — a thick ridge of ice along the roof edge — but the visible ice is not the real danger. The real problem is what is happening behind that ice wall, where liquid water is being forced under your shingles.

How Ice Dams Form

The process starts in your attic. When heat escapes from your living space into an under-insulated attic, it warms the roof deck from below. Snow on the upper roof melts and runs down the slope. When it reaches the cold overhang — where there is no heat from below — it refreezes. More snowmelt arrives and adds to it. Over days and weeks, a thick dam of ice builds up at the roof edge, trapping liquid water behind it. That water has nowhere to go but under the shingles and into your home.

Warning Signs of Ice Dam Damage

  • Large icicles hanging from the roof edge or gutters
  • Water stains appearing on ceilings or walls during or after cold spells
  • Wet or compressed insulation in the attic after winter
  • Paint peeling from interior walls near exterior corners

The Complete Solution for Ice Dams

For immediate relief during winter:

  • Use a roof rake from the ground to pull snow off the lower three to four feet of the roof after each heavy snowfall
  • Never use a sharp tool to chip ice from shingles — this destroys the shingle surface
  • Place calcium chloride ice melt in a nylon stocking and lay it perpendicular across the dam to melt a drainage channel
  • Never use rock salt — it corrodes metal gutters and damages landscape plantings

For permanent long-term prevention:

  • Add attic insulation — R-49 to R-60 is recommended for Indiana and Ohio climates
  • Seal attic air leaks — close all gaps around recessed lights, plumbing pipes, attic hatches, and HVAC ducts with spray foam or caulk
  • Improve attic ventilation — proper soffit-to-ridge airflow keeps the roof deck cold and consistent in temperature
  • Install ice and water shield — during any roof replacement, ensure this self-adhesive membrane is installed along all eaves and valleys as a final backup layer of protection
A winter scene of a house with heavy snow on the roof and a thick ice dam along the eaves, with long, sharp icicles hanging down over the porch

Problem #6: Poor Attic Ventilation — The Roof Problem That Starts From the Inside

Poor attic ventilation is one of the most common — and most underappreciated — causes of premature roof failure. Most homeowners assume that as long as the shingles look intact, the roof is fine. But without proper airflow above the insulation, even a brand-new roof will age rapidly and fail years before it should.

Why Attic Ventilation Matters So Much

  • In summer, a poorly ventilated attic can reach 150°F or more — baking the underside of the roof deck and accelerating shingle deterioration
  • In winter, warm moist air rising into the attic condenses on cold wood surfaces, causing rot, mold, and contributing to ice dams
  • Poor ventilation drives energy costs up in both summer and winter
  • Many shingle manufacturer warranties require proper ventilation — poor airflow can void your warranty coverage

Signs of Poor Attic Ventilation

  • Unusually high energy bills in summer and winter
  • Moisture, frost, or condensation forming inside the attic in cold weather
  • Shingles aging, curling, or deteriorating faster than expected
  • Mold or mildew visible anywhere in the attic space
  • Rooms directly below the attic feeling excessively hot in summer

The Complete Solution for Poor Attic Ventilation

Proper ventilation requires a balanced system — not just one vent added somewhere:

  • Ridge vents installed along the full roof peak allow warm air to exit efficiently across the entire roofline
  • Soffit vents in the underside of the eave overhang provide cool intake air that makes ridge vents work properly
  • Box vents cut near the ridge are a good alternative for homes where a full ridge vent system is not possible
  • Gable vents help in some situations but are less effective than a balanced ridge and soffit system

One critical rule: Never mix ridge vents with gable vents or power ventilators on the same roof. This short-circuits the airflow and reduces the effectiveness of the entire system. Have a professional design the complete ventilation system as a whole.
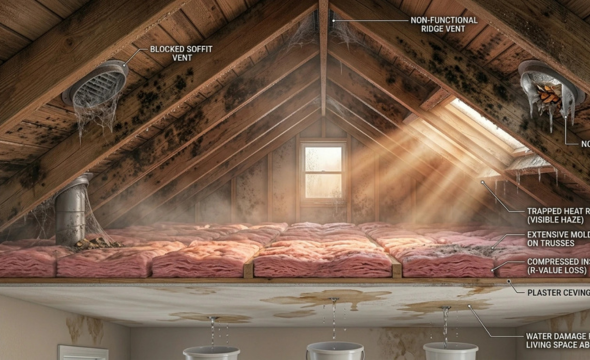
Cross-section illustration of an attic showing mold on wooden trusses, compressed pink insulation, and water leaking through the ceiling into buckets due to poor ventilation and blocked vents

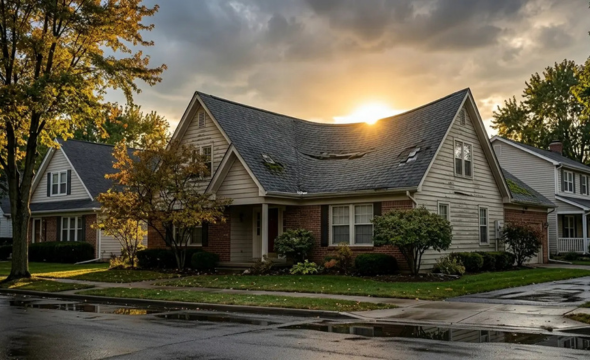
Problem #7: Sagging Roof Deck — A Structural Warning You Cannot Ignore

A sagging or visibly drooping area anywhere on your roof is never a cosmetic issue. Sagging means the structural components of your roof have been compromised. This is a safety issue as much as a roofing issue — and it demands immediate professional attention.

What Causes a Roof to Sag?

  • Prolonged water damage — moisture absorbed by plywood or OSB decking over time causes it to swell, delaminate, and lose structural strength
  • Damaged or rotted rafters — in serious cases the framing itself has been weakened, not just the decking panels
  • Excessive roof weight — too many layers of old shingles piled on top of each other or heavy snow accumulation
  • Original construction deficiencies — undersized lumber used during the original build

Warning Signs of a Sagging Roof

  • A visible dip, bow, or wave in the roofline when viewed from the ground
  • Soft or spongy feeling underfoot when walking on the roof
  • Cracked or split rafters visible when inspecting the attic
  • Doors and windows inside the home becoming difficult to open or close

The Complete Solution for a Sagging Roof

A sagging roof requires a full professional assessment before any repair begins. Here is what the repair process involves:

  1. Structural inspection — a licensed roofer (and in serious cases a structural engineer) assesses which components have failed and over what area
  2. Full tear-off — all shingles, underlayment, and damaged decking are removed to expose the structural framing completely
  3. Rafter sistering — damaged rafters are repaired by attaching a new full-length rafter alongside the damaged one and bolting them together solidly
  4. New decking installation — fresh plywood or OSB panels are installed and properly fastened across the repaired framing
  5. Full roof rebuild — new underlayment, ice and water shield where required, and new shingles are installed to complete the system

Do not delay on a sagging roof. This type of damage does not stabilize on its own. Every rain event, every storm, every heavy snowfall adds more stress to an already compromised structure.
Problem #8: Moss, Algae, and Mold Growth — More Damaging Than It Looks

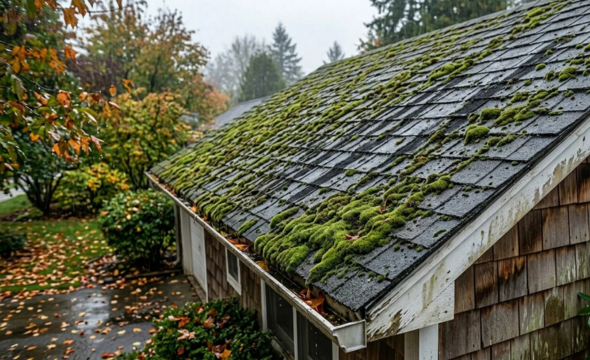
Green patches of moss creeping across your roof or dark black streaks running toward the gutters — most homeowners treat this as a cosmetic issue. In reality, biological growth causes direct physical damage to your shingles and significantly shortens the life of your roof.

How Each Type of Growth Damages Your Roof

  • Algae (dark black or grey streaks) feeds on the limestone filler in asphalt shingles, chemically attacking the shingle material itself
  • Moss (thick green cushions) develops root-like structures that physically lift shingle edges, allowing water to penetrate underneath
  • Lichen (a combination of algae and fungus) bonds so tightly to the shingle surface that removal often pulls granules away with it
  • All three types retain moisture against the shingle surface long after the rest of the roof dries, accelerating deterioration

The Complete Solution for Moss, Algae, and Mold

For cleaning existing growth:

  • Apply a 50/50 mix of water and chlorine bleach, or a commercial roof cleaning product designed for asphalt shingles
  • Let it dwell on the surface for 15 to 20 minutes
  • Rinse gently with a standard garden hose at low pressure — never a pressure washer
  • For heavy moss, gently brush away dead material with a soft-bristle brush, working downward from ridge to eave — never scrubbing upward

For long-term prevention:

  • Install a zinc or copper strip just below the ridge cap — trace metal oxide washes down the slope with every rain and inhibits biological regrowth naturally
  • When replacing the roof, select shingles with copper-infused granules and an algae-resistance warranty
  • Trim overhanging tree branches to increase sunlight and airflow across the roof surface
  • Keep gutters clean so the roof surface dries quickly after rain
An exterior view of a shingle roof heavily covered in thick green moss and dark algae streaks in a damp, wooded environment

Problem #9: Granule Loss on Asphalt Shingles — A Clear Sign Your Roof Is Aging

Granules are the small mineral particles embedded in the outer surface of asphalt shingles. They protect the asphalt beneath from UV radiation, add fire resistance, provide impact protection, and give the shingle its color. When granules wear away, the asphalt is exposed directly to sun and rain and it degrades rapidly.

Normal Aging vs. Premature Granule Loss

Normal granule loss happens gradually over 15 to 25 years. A light dusting in the gutters after heavy rain is expected and not an immediate concern.

Premature granule loss — occurring within the first five to ten years — can be caused by:

  • Hail impact during storms
  • Manufacturing defects in the shingles
  • Physical foot traffic on the roof during maintenance work
  • Improper installation practices

If your roof is relatively young and showing heavy granule loss, this may be grounds for a manufacturer warranty claim, an insurance claim, or both.
How to Identify Granule Loss

  • Significant volumes of granules collecting in your gutters or at the base of downspouts
  • Bald, dark, or discolored patches visible on shingles from the ground
  • Shingles that look thin, uneven, or worn in specific areas
  • Visible asphalt mat showing through in places where the granule coating is gone

The Complete Solution for Granule Loss

  • If loss is isolated to a small section and the rest of the roof is healthy, replacing the affected shingles is reasonable
  • If granule loss is widespread across a roof that is 15 or more years old, a full replacement is the most cost-effective decision
  • When replacing, consider upgrading to impact-resistant Class 4 shingles — they have thicker, more durable granule coatings and often qualify homeowners for a discount on their insurance premiums
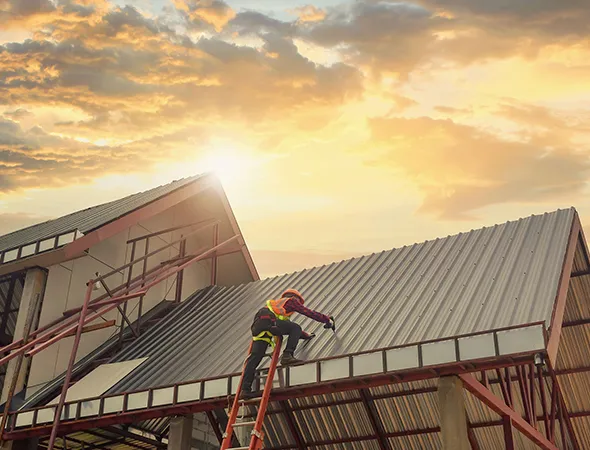
A man is positioned on a roof next to a ladder, actively involved in roofing tasks, demonstrating skill and focus.

Problem #10: Roof Punctures and Holes — Small Openings That Cause Big Problems

A hole in a roof — regardless of how small — is an immediate problem. Water enters through any opening it can find. A nail hole, a small puncture from a fallen branch, a gap left by a removed satellite dish — all of these allow water in and, over time, invite insects and animals to investigate further.

What Causes Roof Punctures?

  • Fallen tree branches during storms
  • Improperly removed satellite dish or antenna mounts leaving exposed holes
  • Animals — squirrels and raccoons gnaw at deteriorated roof edges and wood to create entry points
  • Foot traffic from maintenance workers stepping through weak or brittle sections
  • Hail large enough to crack shingles and penetrate the surface

The Complete Solution for Roof Punctures and Holes

For small holes up to a few inches across:

  • Clean and prepare the area around the hole
  • Replace any cracked or soft decking material beneath the surface
  • Apply a decking patch if the structural layer was penetrated
  • Install new underlayment over the patch
  • Apply new matching shingles to cover and seal the repair completely

For larger holes where decking is compromised:

  • Remove shingles and underlayment across the full damaged zone
  • Cut out the compromised decking panel cleanly
  • Install a new panel blocked between existing rafters for solid structural support
  • Rebuild the complete roofing system from the deck up

When animal damage is involved:

  • Seal every potential entry point along the entire roofline with heavy-gauge wire mesh or metal flashing — not just the hole that was repaired
  • If animals have been nesting in the attic, have a wildlife removal professional address that before sealing the entry point
  • Inspect the attic for secondary damage caused by nesting materials and animal activity
A split-screen image showing rainwater pouring through a large hole in a shingle roof (left) and the resulting interior water damage with a leaking ceiling and puddles on a wooden floor

Problem #11: Hail Damage — The Invisible Threat That Insurance Covers

Hail damage is unique among roof problems because it is not always visible from the ground, it does not always cause immediate leaks, but it consistently and quietly destroys your roof’s protective ability — and it is almost always covered by your homeowners’ insurance policy.

What Hail Actually Does to Your Roof

When hailstones strike asphalt shingles, they:

  • Knock granules loose from the impact point, creating a crater in the shingle surface
  • Create a bruise or compression in the asphalt mat beneath — the shingle looks intact but is structurally compromised
  • Dent soft metal components including gutters, downspouts, flashing, ridge caps, and vent covers
  • Crack or split shingles on direct impact, particularly in very cold weather when shingles are brittle

The damaged spots do not always leak immediately. But over the following one to three years, those bruised and granule-free zones crack, curl, and begin allowing water penetration. A roof that survived a hailstorm with no immediate leaks can develop serious chronic leaking problems within two years.

How a Roofer Identifies Hail Damage

  • Circular impact marks with missing granules at the center
  • Soft, spongy spots in the shingle mat that yield when gently pressed
  • Uniform denting pattern across all soft metal surfaces on the roof
  • Cracking or splitting aligned in a directional pattern matching the storm track

The Complete Solution for Hail Damage

Step 1 — Schedule a professional inspection promptly after any hailstorm. Do not wait to see if leaks develop.

Step 2 — Your roofer documents all damage thoroughly with photographs, measurements, and written descriptions.

Step 3 — File your insurance claim promptly. Most policies have strict deadlines for storm-related claims.

Step 4 — Have your roofing contractor present during the insurance adjuster’s inspection to ensure all damage is identified and nothing is undervalued.

Step 5 — Review the final insurance estimate with your roofer before authorizing any work to confirm the full scope is captured correctly.

Step 6 — Complete the replacement or repair with a contractor you trust.

Important warning: After any major storm, out-of-area contractors will canvass neighborhoods offering quick inspections and pressuring homeowners to sign paperwork immediately. Never sign over your insurance rights to an unfamiliar contractor. Always choose a licensed, locally established roofing company with a verifiable track recor
Problem #12: Storm and Wind Damage — Know What to Do After Every Severe Weather Event

Indiana and Ohio are no strangers to severe weather. Spring thunderstorm systems, summer derechos, fall wind events, and winter ice storms regularly test every roof in the region. Knowing what wind damage looks like and how to respond correctly after a storm protects your home and your insurance claim.

How Wind Damages a Roof

Wind creates simultaneous positive pressure on the windward side of the roof and negative suction pressure on the leeward side. The shingles most vulnerable to this are those along the edges, ridges, and hips — the areas with the least overlapping protection. Once wind breaks a shingle’s adhesive sealant strip, that shingle lifts and flexes in future wind events, cracks at the nail line, and eventually tears off entirely.

Wind damage progression:

  • Shingles lift and sealant strips break
  • Repeated wind stress cracks the shingle along the nail line
  • Shingles blow off, exposing bare underlayment
  • Underlayment tears in severe cases, exposing the raw decking
  • Water enters freely through any exposed section

Post-Storm Inspection Checklist

After every significant storm, check for:

  • Shingles on the ground, in the yard, or in gutters
  • Bare or darker patches on the roof surface visible from the ground
  • Bent, detached, or debris-filled gutters
  • Lifted or displaced flashing along ridges or edges
  • Fascia boards that have been bent or torn away by wind
  • Tree branches resting against or on the roof surface

The Complete Solution for Storm and Wind Damage

Minor wind damage — a limited number of shingles blown off or lifted — is resolved by replacing the missing shingles with matching material and applying fresh roofing cement under any edges that have lifted but not yet blown off.

Moderate damage — large sections of missing shingles or exposed underlayment — requires a full section replacement. The damaged area is stripped to the decking, inspected, and fully rebuilt with new underlayment and shingles from the bottom course upward.

Severe damage — decking exposed across multiple sections, structural impact, or tree damage — typically warrants a full roof replacement and an insurance claim. Emergency tarping is installed immediately to protect the interior while the claim and repair process moves forward.

For your insurance claim:
  • Photograph all damage immediately after the storm — before any temporary repairs
  • File your claim promptly and note the exact storm date
  • Have your roofing contractor present at the adjuster inspection
  • Review the final scope of work carefully before repairs begin
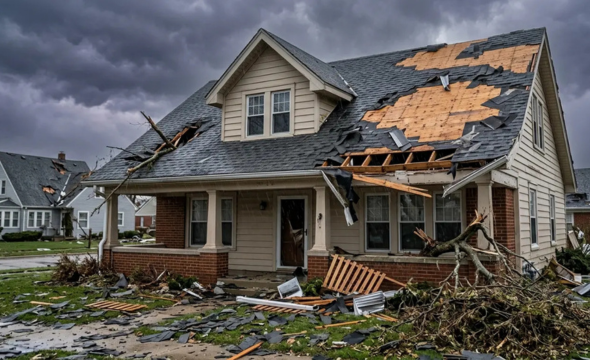
Close-up of severe roof damage after a storm, with multiple shingles ripped away, shattered edges, and exposed roof decking under a dark, moody sky

Problem #13: Old or Aging Roof — When Repairs Stop Making Sense

An aging roof presents a different kind of challenge than any single specific problem. The question shifts from “what is wrong with the roof” to “is this roof still worth repairing, or has it reached the point where replacement is the smarter decision?” Getting that answer right can save you thousands of dollars.

How Aging Affects a Roof

Asphalt shingles are rated for 20 to 30 years depending on quality and conditions. As a roof approaches the end of that lifespan:

  • The asphalt binder dries out and shingles become brittle and inflexible
  • Granules shed more rapidly, leaving the asphalt mat exposed
  • Shingles curl upward at the edges and sometimes buckle in the middle
  • Sealant strips between overlapping shingles dry out, increasing wind vulnerability
  • The underlayment beneath becomes brittle and loses its waterproofing integrity


An aging roof fails piece by piece — a leak here, a few shingles there, some flashing that needs attention in another spot. Each repair seems affordable on its own. But added up over three to five years, the total cost often approaches or exceeds what a full replacement would have cost from the beginning.

Repair vs. Replace — How to Make the Right Decision

Ask yourself and your roofer these questions:

  • How old is the roof? If within five years of its rated lifespan, replacement almost always makes more financial sense than continued repairs
  • How much of the roof is affected? Under 20 to 25 percent — repairs may still be practical. Above that threshold — replacement is usually more cost-effective
  • What condition is the underlayment in? If the waterproof membrane beneath the shingles is deteriorated across most of the roof, no amount of shingle repair will keep the roof reliably dry
  • Has the roof needed multiple repairs recently? Frequent repairs are a clear signal that individual fixes are no longer a viable strategy

What a Proper Full Roof Replacement Involves

A properly done replacement always starts with a complete tear-off — never installing new shingles over old ones. Then:

  1. Full inspection of all decking panels with replacement of any soft, cracked, or rotted boards
  2. New synthetic underlayment installed across the entire deck
  3. Ice and water shield installed along all eaves and valleys
  4. New shingles installed from the bottom eave upward in properly overlapping courses
  5. All new flashing at every chimney, vent, wall junction, and valley
  6. Ridge caps and hip caps to complete the full system
  7. Thorough cleanup including a magnetic sweep for stray fasteners

When replacing an aging roof, consider upgrading to:
  • 30-year architectural shingles — far more durable and attractive than basic shingles on older roofs
  • Impact-resistant Class 4 shingles — may qualify you for homeowners’ insurance premium discounts
  • Energy-efficient cool roof shingles — reflect more sunlight and reduce summer cooling costs
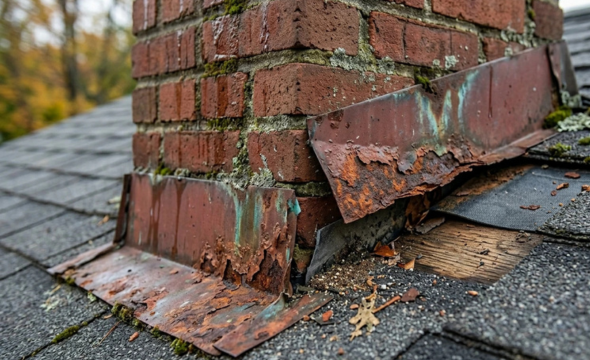
Close-up of a brick chimney showing corroded, rusted metal flashing that has lifted away from the shingles, creating gaps for potential water leaks

How Often Should You Have Your Roof Professionally Inspected?

Roof experts consistently recommend at least one professional inspection per year — plus an additional inspection after any significant storm, hail event, or heavy snow period. Annual inspections catch developing problems before they become expensive repairs and give you a clear current picture of your roof’s condition and remaining lifespan.

Between professional inspections, do your own checks:

  • Walk the exterior perimeter of your home after every significant storm
  • Use binoculars to look at the roof surface without climbing on it
  • Check gutters for granule accumulation and shingle debris
  • Inspect the attic ceiling for any new water stains or moisture signs
  • Look for any visible sagging or change in the roofline from the street

These simple habits take less than 15 minutes and can catch problems months before they cause serious interior damage.

Understanding Roof Insurance Claims

Many of the problems in this guide — including hail damage, wind damage, storm damage, and ice dam damage — are covered under standard homeowners’ insurance policies. The key is knowing when to file, filing promptly, and having the right roofing contractor by your side through the process.

What a good roofing contractor does during an insurance claim:

  • Conducts a thorough independent inspection before the adjuster arrives
  • Documents all damage with professional photographs and written descriptions
  • Attends the insurance adjuster’s inspection to ensure nothing is missed or undervalued
  • Reviews the final insurance estimate for completeness and accuracy
  • Supplements the claim if any damage was overlooked or undervalued in the initial assessment
  • Manages the entire repair process from claim approval through completed installation


Crawley Roofing LLC provides full insurance claim support as a core part of what we do. We have helped hundreds of homeowners across Indiana and Ohio navigate the claim process and receive the full benefit of their coverage. To get expert insurance claim support, contact at (513) 604-0193 now!

Final Thoughts — Protect Your Roof Before Problems Become Disasters

Every single one of the 13 roof problems covered in this guide shares one common truth — they are all manageable when caught early and all become significantly more expensive and damaging when ignored. Your roof is not something to put off until the problem becomes undeniable. By the time water is dripping through your ceiling, the damage has already been building for a long time.

The three habits that protect every roof:

  • Schedule annual professional inspections — every year without exception
  • Clean your gutters and do your own visual checks after every storm
  • Call a professional the moment something looks wrong — do not wait to see if it gets worse

Your roof protects everything underneath it — your family, your belongings, and the structural integrity of your entire home. Give it the attention it deserves and it will protect you reliably for decades.

Ready to Protect Your Home? Call Crawley Roofing LLC Today

Whether you have spotted a warning sign, just gone through a storm, or simply want to know the current condition of your roof — Crawley Roofing LLC is here to help.

With 25+ years of roofing experience across Indiana and Ohio, our team delivers honest assessments, quality workmanship, and complete peace of mind on every single job.

Our Services

Residential Roof Installations — New Roofs & Full Replacements

Roof Repairs & Replacements — Fast, Reliable Fixes That Last

Insurance Claim Support — We Handle the Process For You

Roof Maintenance — Protect Your Investment Year-Round

Frequently Asked Questions (FAQs)

Some of the most common roof problems include leaks, missing or damaged shingles, clogged gutters, poor ventilation, flashing damage, and standing water on flat roofs. These issues often develop gradually and can worsen if not addressed early.

Signs of a roof leak include water stains on ceilings or walls, mold growth, damp insulation, or dripping water during rain. In some cases, leaks may start small and go unnoticed until visible damage appears inside the home.

Shingles can curl or crack due to aging, prolonged sun exposure, poor ventilation, or improper installation. Weather conditions like heat and cold cycles also play a major role in shingle deterioration.

Homeowners should inspect their roof at least twice a year—typically in spring and fall—and after major storms. Regular inspections help identify minor issues before they become costly problems.

Yes, clogged gutters can cause water to back up onto the roof, leading to leaks, wood rot, and damage to the roofing structure. Keeping gutters clean is essential for proper drainage.

Roof flashing is a thin material, usually metal, installed around chimneys, vents, and roof joints to prevent water from seeping in. Damaged or loose flashing is a common cause of leaks.

Proper ventilation helps regulate temperature and moisture levels in the attic. Without it, heat and moisture buildup can lead to mold growth, higher energy costs, and premature roof damage.

Signs include moss or algae growth, debris buildup, sagging areas, water stains, and visible wear on shingles. Neglecting maintenance often shortens the lifespan of a roof.